So you're planning to upgrade your Garmin watch, and you're not sure what to do with the old one. Your first thought might be to list it on eBay, and that's certainly an option, but it's not the only one. Here we've put together a list of ideas to help give your old sports watch a second life, or dispose of it responsibly if it's truly past the point of no return.
Keep it as a backup
The Garmin Connect app is excellent, not least because it allows you to connect multiple devices (watches, bike computers, power pedals, and more), and pool all that lovely data in one convenient place. If you've bought yourself a new watch, there's no reason why you can't set that one as your primary device, and leave your older one configured as a backup.
There are various reasons why you might want to do that. For example, your older watch might be a little slimmer than your new one (particularly if you've invested in a chunky Fenix 7), so you might want to keep the older one for everyday wear and only break out the new one for training sessions when you really need all its extra functions.
Alternatively, you might want to keep the older watch to use while your newer one is charging. Garmin has made great progress with battery life in recent years, but unless you're using an Instinct Solar in power-saving mode, you'll still need to plug it in occasionally. Even if it's just to capture a few extra steps or the occasional night's sleep, having a spare watch means you won't have any gaps in your daily data.
Use it as a bike computer
Garmin made its name in satellite navigation, and its Forerunner watches make great little bike computers when attached to your handlebars. You won't get the biometric data you would it if was on your wrist, but it's easier to read when you're riding, and you can get turn-by-turn directions on-screen.
Garmin sells a neat mounting system that allows you to attach your watch's body to your bike with a quick twist, and detach it just as easily. It costs $29.99 / £26.99 / AU$49 and is compatible with a wide range of watches, including the Fenix 6 and 7, Quatix 6 and 7, Epix (Gen 2), Enduro, D2 Mach 1, and Tactix 7 and Delta.
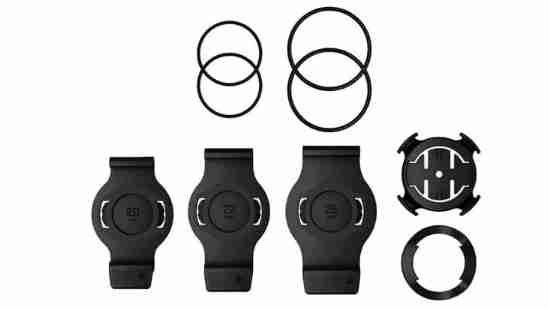
If your watch isn't compatible, or you don't want to splash that much cash, there's also a less sophisticated mount that attaches to your bike with cable ties and allows you to buckle pretty much any Garmin watch in place during rides. It costs $14.99 / £10.99 / AU$17.99.
Donate it to a good cause
If your watch is still in working condition, you could donate it to a worthy cause. There are charities like RecycleHealth in the US that accept working sports watches and fitness trackers. Alternatively, have a look for clubs and organizations in your area that focus on making sports more inclusive, and get in touch to see if they'd be interested in receiving it.
Sell it
If you really don't need two Garmins in your life, or you want to recoup some of the cost of your new watch, selling it may be the best option. First of all, make sure all your data is synced with Garmin Connect so you don't lose any of your precious stats, then open the left-hand menu in the app and select 'Garmin devices'. Tap the watch that you want to sell, then tap the menu icon at the top right and select 'Remove device'.
Your watch contains all kinds of sensitive data, including GPS information, so it's important to perform a factor reset before selling it. Start by powering it off, then press and hold and back/lap button. Once the 'Clear user data' option appears, release the button and select 'Yes'. If your watch doesn't have a back/lap button, check out the manual to find out how to clear your data; you can find the manual by searching for your watch model on Garmin's website .

When shipping your watch off, make sure it's well packaged and take note of any restricted items that your chosen shipping company won't handle. Some refuse to deal with lithium ion batteries like the one inside your Garmin watch.
Even if your watch isn't in full working order, you might still be able to get a little cash by selling it for parts. Just make sure you're fully transparent about any faults.
Recycle it
If your watch is broken, then recycling is another option. It's important to make sure your watch goes to the right place, so that its lithium battery is dealt with safely and any other hazardous materials can be handled properly (some LCDs contain small amounts of mercury, for example).
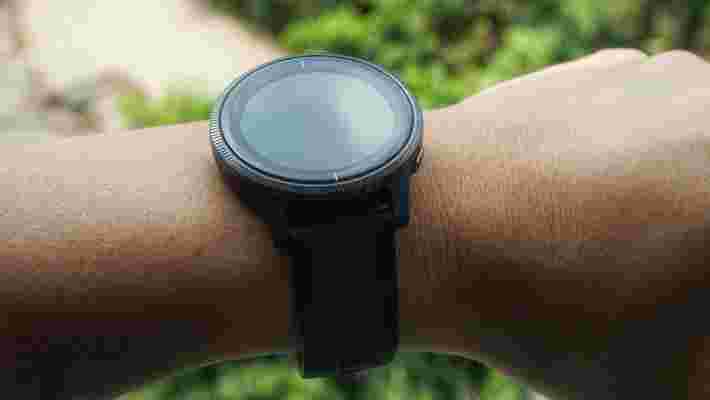
You might already know a nearby recycling facility for waste electrical and electronic equipment (WEEE), but if you're not sure, Garmin itself can provide details of places that can process your watch safely. Just fill in an online form including your name and the name of the device you want to recycle. Alternatively, Googling 'WEEE recycling near me' should bring up some helpful results.
If you can't find anything, try calling an electronics retailer near you. Many of them run their own WEEE recycling schemes, and some will even give you a store discount for bringing them your old tech.
It's worth hanging onto the charging cable, though. All Garmin watches released in recent years use exactly the same type of charger, and you never know when a spare might come in handy.
AirPods Pro vs Sony LinkBuds: which true wireless earbuds are the best?
The Apple AirPods Pro are an excellent pair of true wireless earbuds, with good quality sound, a comfortable design and (unlike the original AirPods ) they’re noise-cancelling, bringing you an immersive listening experience.
However, at $249 / £249 / AU$399, they’re expensive, and during our testing, we found they’re best-suited to iPhone users. So what alternatives are available?
There are plenty of true wireless earbuds to choose from. If you don’t need Apple buds, try the Sony WF-1000XM4 – these are our pick of the top wireless earbuds right now. Alternatively, if you’re looking for a cheaper option, we recommend the Lypertek PurePlay Z3 2.0 , which offer excellent value for money at $99 / £99 (about AU$185).
A new pair of buds that we think could shake up the true wireless market in a significant way are the Sony LinkBuds .
In looks, Sony’s latest true wireless buds are very, very different to the AirPods Pro. The LinkBuds also have clever controls – you can tap your face to skip a track – and a unique open-ring design that not only looks unusual but also brings you great sound and allows you to hear ambient noise, too.
So which is best, the Apple Airpods Pro or the Sony LinkBuds? There’s no easy answer. Both of these models offer slightly different features and excel in different ways.
In this guide, we’ll help you understand the key similarities and differences so you can decide which pair of true wireless earbuds are right for you.

AirPods Pro vs Sony LinkBuds: price and availability
The Apple AirPods Pro were released globally on October 30, 2019. They cost $249 / £249 / AU$399 at the time of release, and that price has remained consistent since.
The Sony LinkBuds were released on February 15, 2022, and are available for $179 / £149 / AU$299.
This makes the Sony LinkBuds considerably cheaper than the AirPods Pro, as well as Sony’s flagship true wireless earbuds, the Sony WF-1000XM4, which cost $279.99 / £250 / AU$449.95. The most significant difference here is the AirPods Pro and XM4s offer noise cancellation, whereas the Sony LinkBuds don’t, which could account for the lower price.
Cost-wise they’re more on par with the price of the Apple AirPods 3 . They’re $179 / £169 / AU$279 and also don’t have noise cancellation.

AirPods Pro vs Sony LinkBuds: design
One of the biggest issues for true wireless earbuds manufacturers is packing lots of clever tech into a compact build. The Apple AirPods Pro and Sony LinkBuds both excel in this respect, with sleek, stylish, and lightweight designs.
Apple’s buds have the distinctive AirPods look, but with shorter stems than the regular, non-pro models. They have silicone eartips in a range of sizes, so you should be able to get the fit just right. To ensure they’re comfortable, they also have air vents, preventing that strange suction feeling that’s common with earbuds. They generally fit securely – even during a workout – and each bud weighs only 5.4g.
The Sony LinkBuds are unusual because they have a fully open ear design. The bulk of the earbud housing sits in the conch of your ear – held in place by a rubber fin – and a ring-shaped driver surrounds your ear canal.
Although you have several rubber fins to choose from to anchor them in place, this design felt a bit uncomfortable for us during our testing. This was likely because the buds sit in a different place than stem-style designs, but that could be down to personal anatomy – they might not be well-suited to smaller ears.
The LinkBuds are Sony’s smallest true wireless buds – 51% smaller in volume than the Sony WF-1000XM4 – and they weigh in a little lighter than the AirPods Pro at just 4.1g each.
Both pairs of true wireless earbuds have an IPX4 water-resistant rating, which means they can be worn outside in the rain and handle a sweaty workout at the gym.
AirPods Pro vs Sony LinkBuds: Controls and setup
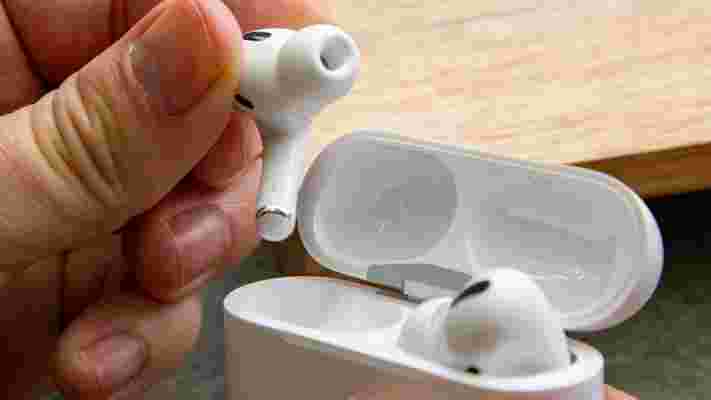
The AirPods Pro have a small ridge on their stems, which is how you control them. You can activate noise-cancelling / Transparency mode or skip and pause tracks. We thought this seemed tricky to use at first during our testing, but it became second nature pretty quickly.
Because the LinkBuds are so tiny, tapping on the buds themselves can be challenging. That’s why Sony has implemented a new feature called Wide Area Tap. This means you can tap the area in front of your ears to control the buds. Cool, right? Just tap your face to play or pause your music.
The AirPods Pro and LinkBuds allow you to customize these control settings and make other changes within their apps, too. For example, with the Sony Headphones Connect app, you can also enable Sony’s 360 Reality Audio technology, which requires you to take a quick photo of each ear. These are then analyzed to deliver personalized immersive sound performance.
As you might expect from an Apple product, the AirPods Pro are also incredibly straightforward to set up and tailor to your preferences. You can run a quick audio test to check you’ve got the right fit, and, like Sony’s app, you can tailor the sound to suit your ear structure.
AirPods Pro vs Sony LinkBuds: Audio performance
The most significant difference between these earbuds is noise cancellation – the AirPods Pro have it, and the Sony LinkBuds don’t.
With the Apple AirPods Pro, you can customize the level of ANC, and there’s also a Transparency Mode, which allows you to hear what’s going on around you and have a conversation if you need to without taking them out of your ears.
In contrast, Sony designed the LinkBuds to allow you to hear what’s going on in your surroundings all the time, rather than block it out.
When it comes to general audio performance, the open design of the Sony LinkBuds means they offer a spacious and wide soundstage – you don’t usually get that from a pair of in-ear headphones. The 12mm drivers are also fairly powerful, while Sony’s Integrated Processor V1 inside means your music sounds authentic with minimal distortion.
You’ll also find support for Sony’s DSEE upscaling technology, automatic pausing when you remove your earbuds, and 360 Reality Audio, which allows for virtual surround sound.
However, because these buds are open and don’t create a seal in your ear canals, you might lose detail due to background noise and won’t get that chest-thumping bassy experience either. That’s a tradeoff you need to make for a pair of buds like these, which are for all-day use in various situations.
In comparison, the Apple AirPods Pro have a well-balanced soundstage, smooth mids, and more bass-heavy sound. We found that they tend to perform their best with pop, rock and RnB, but thought they lack a little detail when it comes to classical music.
Generally, audio is likely to sound more immersive with the AirPods Pro than the LinkBuds. This is thanks to several factors, including noise cancellation, the physical seal they create in your ear canal, and Spatial Audio , which works in 5.1, 7.1 and Dolby Atmos , positioning sound all around you within a ‘virtual sphere’.
AirPods Pro vs Sony LinkBuds: Battery life
After a full charge, the AirPods Pro will give you 4.5 hours of listening time and a further 24 hours with the charging case. This will depend on usage – if you’re making lots of calls, expect that number to be closer to 3.5 hours.
The charging case supports wireless charging and has a handy quick charging feature, which promises one hour of listening time for just five minutes of charging time – although we felt that was a little optimistic when we reviewed them.
With the Sony LinkBuds, you get 17.5 hours of battery. That breaks down to 5.5 hours from the earbuds and another 12 from the charging case. You’ll get quick charging with the LinkBuds, too, which means you can top them up in a hurry, but there’s no wireless charging.
Takeaway
If you can’t choose between the AirPods Pro and Sony LinkBuds, the deciding factor could be the price. The Sony LinkBuds are a whole $100 / £100 cheaper than the AirPods Pro.
Let’s not forget the brands behind the buds, too. The Apple AirPods Pro have a distinctive AirPods look, and if that appeals to you, the LinkBuds won’t cut it. What’s more, the AirPods Pro work very well with other Apple products, so if you’re already bought into that ecosystem, the AirPods are a solid choice.
However, we think the biggest thing to consider between these two rival buds is how you’re going to use them. You can wear the LinkBuds all day. You can take calls, listen to music and hear the world around you as you do. For some people, that will be appealing, especially if you like using headphones at work when you need to be aware of the people around you.
But suppose that isn’t a priority for you and, instead, you want fully immersive sound that can block out the world thanks to noise-cancelling tech? In that case, you’re better suited to the AirPods Pro – especially if you tend to only reach for your headphones in specific scenarios, like when you’re working or heading to the gym.
Having said that, if noise-cancelling is your ultimate priority above all else, we recommend you look elsewhere. You’ll find better noise cancellation from other true wireless earbuds, like the Bose QuietComfort Earbuds .
Both the AirPods Pro and the Sony LinkBuds are two great pairs of true wireless earbuds, and you can’t go wrong with either. But it is worth thinking about your listening habits and whether you’d benefit from hearing the world around you easily or would prefer to wrap yourself up in a cocoon of sound whenever you like.
I bought a CRT TV for a retro gaming setup – and it was an existential nightmare
Recently I’ve been eager to tap into my childhood nostalgia, and as a lifelong gamer, that’s primarily entailed dropping cash on a retro gaming setup. In a rose-tinted bid to re-experience the games of my youth, I went all out and bought a PS1 (the impressively tiny revision that’s still a looker, aesthetically), a bunch of games and, most importantly, a 14-inch Bush 1473T CRT TV to play them on.
But with CRT being such an outdated display method, why bother buying one? After all, surely any modern TV should suffice if all you need to do is plug a console into it, right? Not quite. The problem with even the best 4K TVs is that they lack input for a SCART adaptor, the primary method for hooking up older consoles like the PS1 and N64 to AV.
Going a step down to a 1080p display, you’ll likely find a SCART port. But another issue arises in that older games – particularly pixel-based games or ones with a low polygon count – were never designed with flat-screen TVs in mind. This has the knock-on effect of making retro games look worse. Edges can look overly jagged, and pixels aren’t blended together as seamlessly. As a result, you lose quite a lot of visual depth when playing old games on more modern displays.
This is where the appeal of a CRT TV comes in. The slightly rounded display, as well as its scanlines, hide much of the imperfections of older games when it comes to visual quality. In fact, most retro titles were designed with these displays in mind, as they allow for a much softer image that can blend pixels together. Objects appear much less jagged as a result, and pixel-based characters and backgrounds look as they’re supposed to, and not as an ugly blotch of colored squares.
So, when each key part of the setup arrived at my house, I was keen to get the whole thing running as soon as possible. I hooked up the PS1 to the CRT, made sure everything was plugged in and working as intended and strapped myself in for the ride. Little did I know that ride would be a rollercoaster.
The nightmare begins
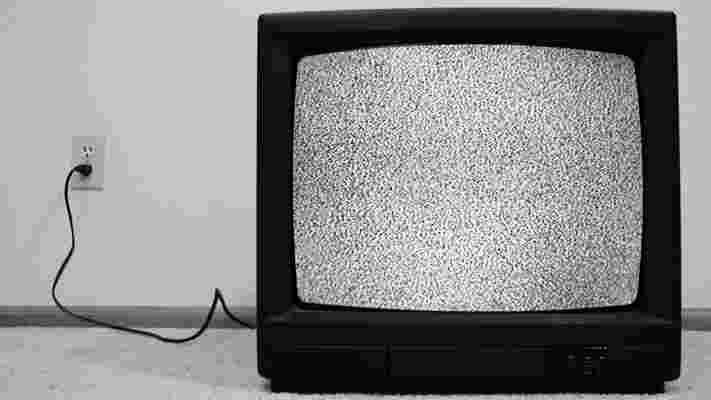
In my desperation to create a lovely little retro gaming setup, I completely neglected to factor in that setting up a CRT TV can be an absolute nightmare. It goes without saying that they completely lack any of the conveniences of a more modern display like the superlative LG CX . But on top of that, there are a few rather obtuse hoops you have to jump through in order to get a retro setup working.
If you lack composite cables, for example, your only other option is using an RFU adaptor, which does come included with boxed PS1 consoles. This adaptor doesn’t go through AV, but it does require you to first find the channel the adaptor is set to, and then manually tune the display until the picture is as you want it. And usually, you can’t tune a CRT TV without the additional functionality of a compatible remote.
For me, composite cables are the bare minimum requirement when it comes to creating a retro gaming setup with a CRT as the centrepiece. But even this isn't perfect. Composite cables combine three separate cables (a yellow one for video, and red and white ones for audio) into one source that passes through the SCART adaptor.
The issue, then, is that the yellow cable is doing a lot of the legwork. That it's the sole video input means that the final image can appear noisy. This is an issue lessened by component cables (which you'll typically find as a set of red, blue and green cables). This breaks the video signal into separate channels, allowing for a cleaner image overall.
While I unfortunately lacked component cables, I was able to dig up a set of composite cables and a SCART adaptor. But that wasn’t the end of my woes, as I didn't think about the fact that I’d need a compatible TV remote in order to access AV output in the first place. The Bush CRT TV that I’d bought on eBay didn’t come with one included.
A comedy of errors

After messing around with the buttons on the TV to no avail, I realized I'd have to track down a remote just so I could access the AV output on my CRT. Messing with the CRT's onboard buttons did nothing, not even rolling the channel back to '0' and beyond. Little did I know that this would be by far the hardest hurdle to clear, as finding a remote that worked with my CRT was easier said than done.
I tried multiple universal remotes and second-hand remotes ordered from spare parts websites, which is one of the few reliable options left when it comes to buying an old CRT TV remote. None of them worked and I was beginning to panic. Had I really just blown all this cash on a retro gaming setup, only to fall at the final obstacle? I felt exactly as I did when fighting some of Elden Ring ’s toughest bosses: hopelessly trapped in a never-ending cycle of trial, error and despair.
The whole fiasco has done one thing for me, though. It made me realize just how much I’d taken modern TV conveniences for granted. Most modern 4K displays are phenomenally easy to use. Whether it's because of the simplicity of HDMI, or the abundance of streaming apps built into these smart TVs, convenience rules the day on modern displays compared to TVs of old.
This isn't to say that you should avoid CRT TVs like the plague. On the contrary, I'd argue that in the current display landscape, playing older games on a CRT can be a transformative experience.
If you haven't had the pleasure of playing classic games on a TV they were designed for, then you may at least have seen gameplay snippets uploaded to YouTube or social media platforms. Such clips can often make retro games look considerably dated visually, especially when robbed of those gorgeous curved CRT displays and accurate scanlines that blend the picture in such an elegant way.
It pains me to say, though, that this story doesn’t have a happy ending. At least not yet. While the joy of being able to play games like Tekken 3, Ridge Racer Type 4 and Castlevania: Symphony of the Night on a display they were intended for still eludes me, my search for a working remote will continue.
After all, I’m not about to give up when I’ve already sunk a decent amount of cash on the setup. Rome wasn’t built in a day, as they say.
